To register a new scenario, click the "Create Scenario" option. The scenario lead screen will be displayed, such as the image below:
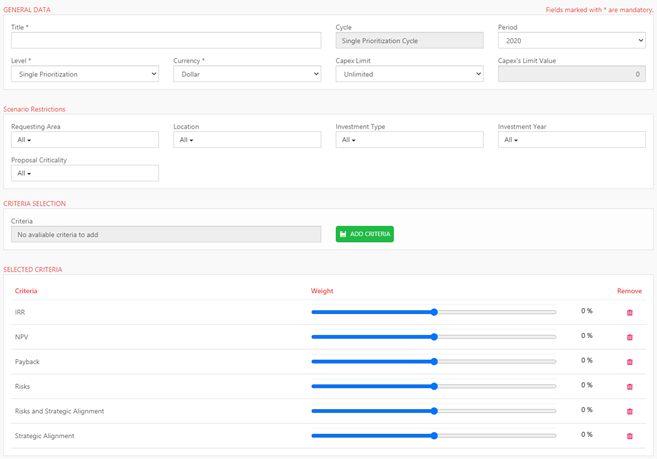
On this screen, users must fill in the information that will give boundaries to the scenario. In the General Data section, users have the following information:
• Title: Scenario Title
• Cycle: Cycle of prioritization of proposals
• Period: To which budget that proposal belongs
• Level: Because prioritization can be done at various levels, users must indicate at which level that proposal belongs
• Currency: Scenario currency
• Capex Limit: Flag to indicate whether CAPEX is a prioritization criterion
• Capex’s Limit Value: If CAPEX is a prioritization criterion, users must indicate what this value would be
In the Scenario Restrictions section, users can indicate which characteristics the proposals must have to enter the scenario. The features are:
• Requesting Area
• Location
• Investment Type
• Investment Year
• Proposal Criticality
• Or additional fields
In the Criteria Selection and Selected Criteria sections, are the places where the user will select the prioritization criteria previously configured by the system administrator, and add to their scenario, as well as give weight to each of these.
To save the scenario just click on the "Save" option. The system will save the information and display the options to select the prioritization criteria of the proposals.
If a user wants to cancel the operation, simply click the "Exit" option, which the system will cancel the operation and return to the scenario listing screen (this option will only become available after any new scenario is saved).
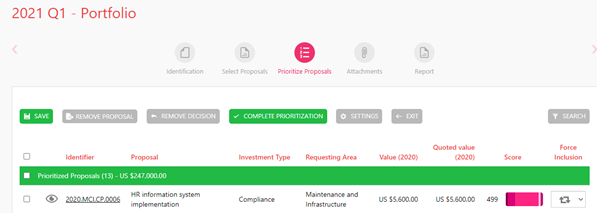
The system will also make available the Identification, Select Proposals, Prioritize Proposals, Attachments, and Report sections as shown below: